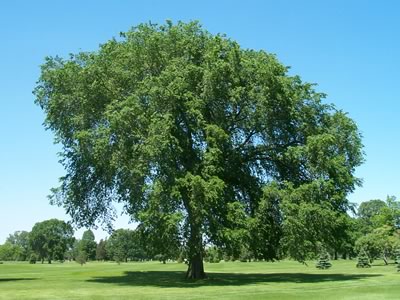
Elm Tree Planting Steps
 Based on nursery standards,a field-grown tree or container-grown tree
has less than 5-20% of the fine feeder roots of the same size tree in
a field situation, creating stress issues for the new tree. The Science
of Planting Trees is promoting rapid root growth to quickly reduce the
water stress imposed by the harvest and planting process. Post-planting
stress or otherwise known as transplant shock is the stress factor induced
by the reduced root system.
Based on nursery standards,a field-grown tree or container-grown tree
has less than 5-20% of the fine feeder roots of the same size tree in
a field situation, creating stress issues for the new tree. The Science
of Planting Trees is promoting rapid root growth to quickly reduce the
water stress imposed by the harvest and planting process. Post-planting
stress or otherwise known as transplant shock is the stress factor induced
by the reduced root system.
Planting tree too deep is a major issue killing more trees in the landscape than all insect and disease problems combined!
Step 1 of planting process
Check depth of roots in root ball
Generally, at least two structural roots should be within the top 1-3 inches of the soil surface, measured 3-4 inches from the trunk.
Don’t assume that the tree was planted at the proper depth at the nursery. Take the time to check. With a slender screwdriver, gently probe the root ball 3-4 inches out from the trunk to locate structural roots and determine depth. If the tree is not at the correct depth, correct it in the planting process.
Check the depth of the tree in the root ball by gently probing the soil 3-4 inches out from the trunk with a slender screwdriver. Generally, at least two structural roots should be within the top 1-3 inches of the soil surface, measured 3-4 inches from the trunk.
Excess soil over the root ball may be removed during the backfill process or over time. Adjust the planting depth to compensate.
Step 2 of planting process
Dig shallow, saucer-shaped
planting hole
three times root ball diameter
To maximize soil oxygen levels the top of the root ball rises 1-2 inches above grade.
Root ball sits on undue soil, stabilizing the tree and preventing sinking and tilting.
A saucer-shaped planting hole three times the root ball diameter with sloping sides allows the root system to grow rapidly to 400% of the root ball volume before being slowed by the lower oxygen levels in the site soil. This is enough to minimize post-planting stress in normal planting situations.
The wide saucer-shaped planting hole gives the tree more tolerance to over-watering problems and waterlogged soils.
The wide planting hole allows for root ball wrappings to be removed after the tree is situated in the planting hole.
Step 3 of planting process - Set tree in place
Set tree in place. If the trunk has a crook (dogleg), the inside turn must go to the north to reduce potential of winter bark injury. Do not remove wrappings that hold the root ball together. Additional wrapping used to facilitate handling of the tree may be removed.
Step 4 of planting process - Pack base
The wide planting hole allows an extra step to help stabilize the tree. After the tree is situated, firm a small ring of soil around the base of the root ball.
Step 5 of planting process
Remove wrappings on the upper 12”
or upper 2/3 of the root ball, which ever is larger
Burlap left around the root ball may interfere with rooting.
Burlap left above the soil surface wicks moisture from the root ball.
Synthetic burlap, fabric grow-bags and nylon twine never decompose in the ground and may interfere with roots.
Wire baskets last 30 plus years in the ground and may interfere with rooting over time.
Step 6 of planting process - Check for girdling roots
Cut roots circling the root ball. Cut off root tips exposed outside of the root ball.
Step 7 of planting process - Backfill
When backfilling, be careful not to over-pack the soil reducing large pore space or soil oxygen levels. A good method is to simply return soil and allow water to settle it when irrigated.
Soil “peds” known as dirt clods up to the size of a small fist are acceptable in tree planting. In clayey soils it’s undesirable to totally pulverize the soil, as this destroys large pore space.
Changes in soil texture which actually changes in pore space between the root ball soil and the backfill soil and between the backfill soil and the site soil create soil texture interfaces that impede water and air movement across the interface. To deal with the interface, the top of the root ball must come to the surface, which means no backfill soil covers the top of the root ball. Backfill soil covers the root ball knees, gradually tapering down.
Step 8 of planting process - Staking/stabilization
When properly planted with the tree set on un-dug soil, most trees in the landscape don’t require staking or underground stabilization. Staking may be desirable to protect the tree from people activities. Staking or underground stabilization may be needed in windy areas.
Install staking before watering so you don’t pack down the wet soil. Underground stabilization is typically installed before the backfill step.
Step 9 of planting process - Water
Step 10 of planting process - Final Grade
With the wide planting hole, the backfill soil may settle in watering. Final grading may be needed after watering.
Step 11 of planting process - Mulch
As a rule of thumb, up to two inches of wood/bark chips may be placed over the root ball. Over the backfill area and beyond, 3-4 inches of wood/bark chips gives better weed control and prevents soil compaction from foot traffic. Additional amounts may reduce soil oxygen.
Do not place wood/bark chips up against the trunk. On wet soils, mulch may help hold excessive moisture, being undesirable. Wood/bark chips are not suitable in windy areas.